React Onboarding Assignment
Github Repo: react-onboarding-repo
Project Setup
- Checkpoint 0: Clone the github repo, run npm i to install dependencies, then run npm start to start the dev server for React. Anytime you make a change to a component, it should be reflected on this page! Navigate to the src folder to find the main page in App.jsx.
- Checkpoint 0.5: The quickstart guide will be very helpful for donut clicker!! https://beta.reactjs.org/learn
Project 1: Donut Clicker
You’ve just started a donut business, and need to write a modern component-based JavaScript web application to record the number of donuts you’ve sold (don’t think about it too hard.)
Step 1: The Basics
- Checkpoint 1: Import donut component into main page so it will render the a donut! Comment out the SpyNameGenerator component if it exists.
- Checkpoint 2: Change the div to an img and change the src to tag to add a display the image of the donut!
- Checkpoint 3: Create a donut count display in the donut component! Use the useState hook to store number representing the number of times the donut has been clicked, then Then, make the donut clickable using the onClick prop and the state setter from the useState hook to update the count!
- Now, when you click on the donut, the number in the counter should go up!
Step 2: Prettying it up!
- Checkpoint 1: Use the onMouseDown and onMouseUp props to make the donut shrink when clicked and grow when released!
- Hint: Find a way to dynamically adjust the the height and width properties on img element to create the pop-in and pop-out effect!
- Checkpoint 2: Create a “you win!” banner after the user has reached 10 donut clicks. This will be an additional component that is only displayed once there have been 10 clicks, with text saying “You win!”
- Hint: In react, there’s a concept known as conditional rendering, where components are dynamically added or removed depending on state. Look into this!
Step 3: Design Considerations
- Checkpoint 1: Notice how our donut component is getting pretty big! This goes against the React design principles of having a single component be dedicated to a single thing. Think: How could we refactor the donut component to better fit this?
- For example, right now we’re displaying the number of donut in the same component as the donut itself. Design wise, it would be a better idea to factor these out into two separate components, with a CounterDisplay component to just show the count, and then a DonutButton component to be the interactable part.
- Notice, the button needs access to the counter state in order to increase it, and the counter needs access tot he counter state to display the correct value. How might you consider composing this data if they’re two separate components?
- Hint: Props allow you to pass values from a parent component to a child component.
- Checkpoint 2: Try adding an “evil donut” button by creating an EvilDonutButton component, which instead of adding a donut to the counter, removes a donut. Otherwise, it should look and behave identically (should also shrink when clicked),. How can you have it so two separate components that interact with the same state, located in another component?
- Hint: React is designed for unidirectional data flow, using props to pass data from parent components to children. In this case, how should the counter display be composed in relation to the two Donut buttons?
Project 2: Spy Name Generator
Spies have it rough. They can’t let anyone know their real name, and have to come up with a fake alias so they don’t get caught. Your job is to develop a web application to help do some of the heavy lifting of being a spy: generating a fake SpyName!
A person’s spy name is just their real name backwards. Shh! Don’t tell anyone!
Step 0: Setup
- Navigate to the App.jsx file again and import the SpyNameGenerator component, and remove any other components from other projects. Try rendering the page. It should look like this!
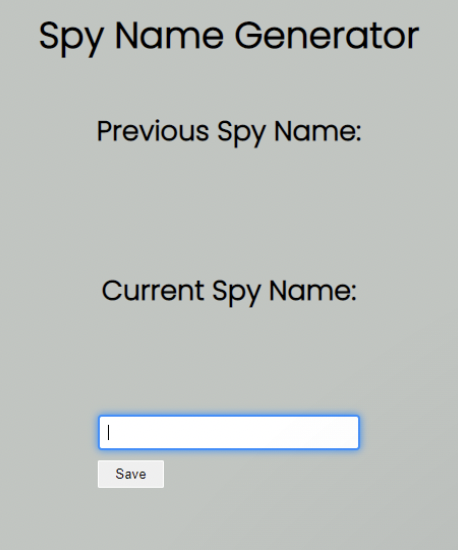
- Typing in the currently does nothing. Pressing the button does nothing.
- Our goal is to have it so as you type text into the textbox, the SpyName is generated under the Current Spy Name header. Hitting save will save the current spy name under the Previous Spy Name Header, allowing you to try out new spy names!